Updated for Minecraft Java 26.2 · Chaos Cubed
How to Build an Iron Farm in Minecraft 26.2
Step-by-step Java Edition iron golem farm — three panicking villagers, a named zombie, and ~330+ iron ingots per hour. Mechanics unchanged in Chaos Cubed.
Last updated: Jul 22, 2026 · ~15 min read
Table of Contents
Iron farms are one of the most useful contraptions you can build in Minecraft. They provide a renewable source of iron, which is essential for tools, armor, hoppers, and many other items. Instead of spending hours mining underground, you can create a farm that automatically generates iron for you.
This guide walks you through an efficient iron farm based on Voltrox's design that produces 330+ iron per hour. It's relatively simple to build but provides an excellent return on investment — and it still works on current Java 26.2 (Chaos Cubed).
Version compatibility
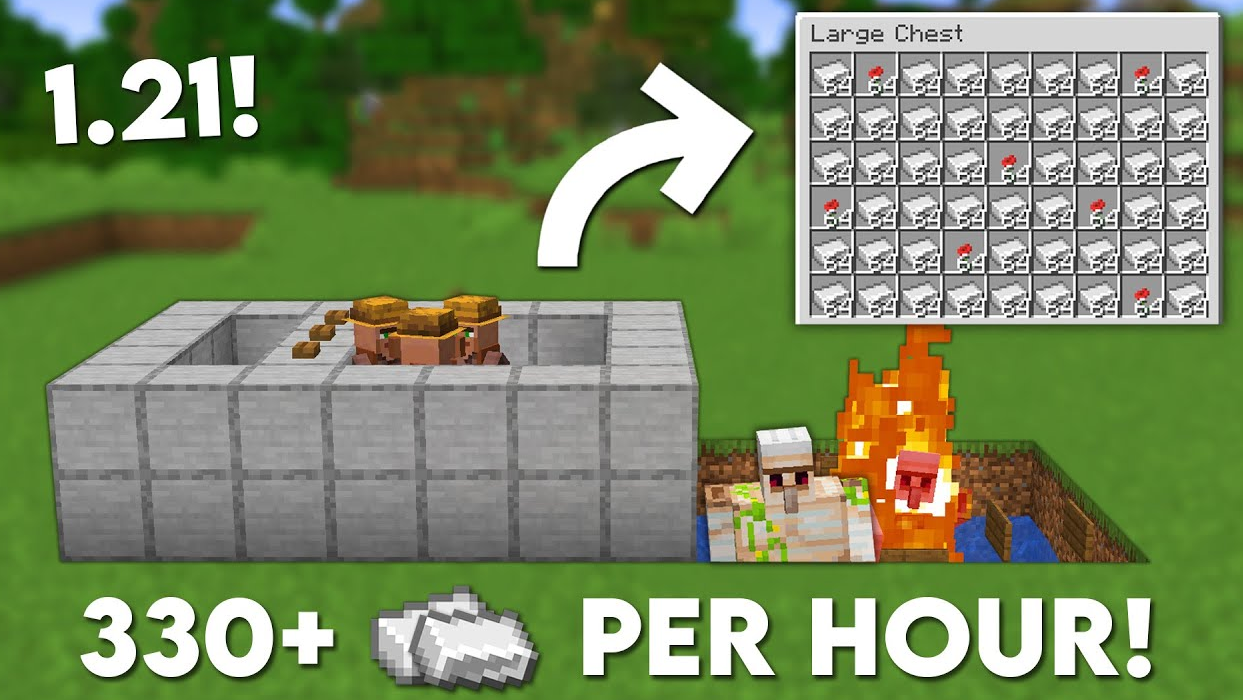
Minecraft 26.2 (Chaos Cubed) compatibility
This iron farm is fully compatible with Java Edition 26.2 Chaos Cubed. Sulfur caves and sulfur cubes did not change how villagers panic or how iron golems spawn.
- 26.2 Chaos Cubed: No iron-farm mechanic changes — same panic summoning and rates.
- 26.1 Tiny Takeover: Name tags are craftable, so nametagging your farm zombie is easier in Survival.
- Older 1.21.x worlds: The same build still applies if you upgraded forward to 26.2.
Always name-tag (or boat/minecart) the zombie so it never despawns while you AFK.
Understanding Iron Golem Mechanics
How Iron Golems Spawn
On Java, villagers summon iron golems when they panic (see a zombie/pillager) or gossip. Panic farms are what this guide uses — more reliable and only need three villagers:
- Villagers: At least 3, close together, that have slept recently.
- Beds: Each villager needs to be linked to a bed.
- Workstations: Villagers need access to workstations.
- Spawn Space: A valid 3×4×3 space is needed for the golem to spawn.
- Spawn Timing: Villages attempt to spawn an iron golem every 35 seconds if conditions are met.
Villager Mechanics
For optimal iron golem spawning, villagers must be able to:
- Sleep in their beds at night (or think they can)
- Access their workstation
- Gossip with other villagers
- Be scared by a zombie (for most efficient designs)
Why This Design Works
- Compact Design: Uses minimal space while maintaining high efficiency
- Optimal Villager Placement: Villagers are perfectly positioned to trigger golem spawns
- Resource Efficient: Uses basic materials like stone bricks and trapdoors
- Easy Collection: Automated item collection system with hoppers
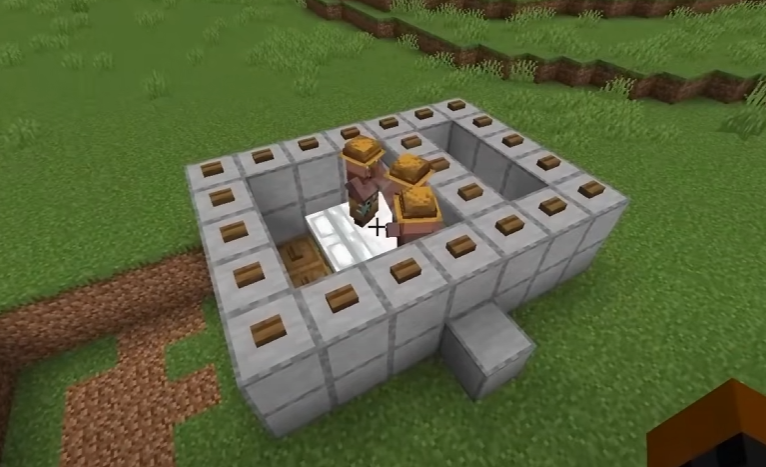
The villager pod design ensures optimal iron golem spawning rates
Video Tutorial
Credit: Tutorial by Voltrox on YouTube. Follow along with the video for detailed building instructions.
Materials Needed
Basic Materials
- 64 Stone/Cobblestone (for structure)

- 32 Wood (for workstations and beds)

- 6 Wool (for beds)

- 16 Glass (for zombie containment)

- 2 Hoppers (for collection)

- 1 Chest (for collection)

Additional Materials
- 1 Lava Bucket (for killing golems)

- 1 Water Bucket (for collection)

- 1 Zombie (in minecart or boat)

- 3 Villagers

- 4 Signs (for lava support)

- 8 Trapdoors (for spawn control)

- 3 Name Tags (to prevent despawning)

Step-by-Step Building Guide
Building the Villager Containment Area
- 1
Create the Villager Pod
Build a small enclosed room about 4 blocks high where your 3 villagers will be placed.
Make sure the room has space for 3 beds, arranged so that each villager can sleep in one of them.
Tip: The villager pod should be approximately 5×5 blocks in size to give villagers enough room to move around but not so much that they wander too far from their beds.
- 2
Place Beds and Workstations
Place 3 beds inside the villager pod, ensuring each villager can access their bed.
Add workstations (composters are easiest) next to each bed so villagers can maintain their professions.
Tip: Make sure the beds are placed so that villagers can pathfind to them. They need to be able to access the pillow end of the bed.
Creating the Zombie Holding Area
- 3
Build the Zombie Chamber
Create a small chamber made of glass blocks where the zombie will be placed.
Position this chamber so that all villagers can see the zombie, but the zombie cannot reach them.
Tip: The zombie should be within 8 blocks of all villagers to keep them in a panic state, which increases iron golem spawn rates.
- 4
Secure the Zombie
Place a zombie in a minecart or boat inside the glass chamber to prevent it from moving.
Name the zombie using a name tag to ensure it doesn't despawn over time.
Setting Up the Iron Golem Spawning Platform
- 5
Create the Spawning Platform
Above the villager pod, build a flat platform where iron golems will spawn.
The platform should be at least 8×8 blocks to provide enough space for golems to spawn.
- 6
Control the Spawning Area
Place trapdoors around the edges of the platform to prevent golems from wandering off.
Make sure there are no other valid spawning spaces within 16 blocks of the villagers.
Tip: You can use slabs, buttons, or string to prevent spawning in unwanted areas while maintaining the aesthetic of your build.
Building the Collection System
- 7
Create the Water Channel
Design a water channel that will push spawned golems to a central killing chamber.
The water should flow towards a drop-off point where golems will fall into the killing chamber.
- 8
Build the Killing Chamber
At the end of the water channel, create a pit where golems will fall.
Place signs on the walls of the pit and add lava above them. The signs will hold the lava in place while allowing items to fall through.
Tip: The lava should be positioned so it only burns the golem's head, allowing them to drop items when they die.
- 9
Set Up the Collection System
Place hoppers at the bottom of the killing chamber to collect iron and poppies.
Connect the hoppers to a chest where you can easily access the items.
Final Steps
- 10
Add Villagers
Transport 3 villagers to the pod using minecarts, water elevators, or by breeding them there.
Make sure each villager can access a bed and workstation. You can name them with name tags to prevent despawning.
- 11
Light Up the Area
Place torches or other light sources around the farm to prevent other hostile mobs from spawning.
Make sure there are no dark spots where mobs could spawn and interfere with your farm.
- 12
Test the Farm
Wait for iron golems to start spawning. They should appear on the platform and be pushed by water into the killing chamber.
Check the collection chest periodically to collect your iron and poppies.
Important Note
Iron Farm Calculator
Use this calculator to plan your iron production and see what you can craft with the iron from your farm. Adjust the farm rate if your design produces more or less than 330 iron per hour.
Troubleshooting Common Issues
No Golems Spawning
Not Enough Villagers
Ensure you have at least 3 villagers in your farm.
Villagers Not Linked to Beds
Villagers must be able to pathfind to their beds. Watch them at night to ensure they're sleeping.
No Valid Spawn Spaces
Ensure there are valid 3×4×3 spaces for golems to spawn.
Other Villages Nearby
Check for other villages within 80 blocks that might be interfering.
Collection System Issues
Golems Not Moving to Killing Chamber
Check water streams for proper flow. Ensure there are no gaps or obstructions.
Golems Not Dying
Ensure lava is positioned correctly to only hit their heads. Check that they can't escape.
Items Not Being Collected
Check hopper connections. Ensure items are falling onto hoppers.
Storage Full
Add more chests or an overflow system to handle excess items.
Villager Issues
Villagers Escaping
- Use solid blocks rather than fences for containment
- Ensure there are no half-slabs or stairs they can pathfind to
- Make pods at least 3 blocks high
- Consider using carpets on top of fence posts to prevent jumping
Villagers Not Scared
- Ensure villagers can see the zombie (use glass blocks)
- Check that the zombie is not too far away (should be within 8 blocks)
- Make sure nothing is blocking line of sight
- Try using a name tag on the zombie to prevent it from despawning
Java vs. Bedrock Differences
This iron farm design is optimized for Java Edition. If you're playing on Bedrock Edition, you'll need to make some significant modifications as the mechanics work differently.
| Feature | Java Edition | Bedrock Edition |
|---|---|---|
| Minimum Villagers | 3 villagers | 10 villagers |
| Bed Requirement | 1 bed per villager | 1 bed per villager |
| Workstation Requirement | Required | Not required |
| Zombie Requirement | Highly recommended for efficiency | Helpful but less critical |
| Spawn Conditions | More lenient | More restrictive |
| Spawn Rate | ~35 seconds between attempts | ~30 seconds between attempts |
Bedrock Edition Modifications
If you're playing on Bedrock Edition, here are the key changes you'll need to make to this design:
- More Villagers: Use at least 10 villagers instead of 3.
- Larger Pod: Build a larger villager pod to accommodate the additional villagers.
- More Beds: Place at least 10 beds for the villagers.
- Larger Spawning Platform: Create a larger spawning platform (at least 16×16).
- Containment: Use fences or walls to prevent golems from wandering off, as they may behave differently in Bedrock.
Frequently Asked Questions
Does this iron farm work in Minecraft 26.2 (Chaos Cubed)?
Yes. Chaos Cubed did not change Java villager panic or iron golem summoning. The same 3-villager + zombie design still targets about 330+ iron ingots per hour. Tiny Takeover (26.1) made name tags craftable, which makes keeping your farm zombie permanent easier.
How many iron ingots per hour does this farm produce?
About 330+ iron ingots per hour on Java Edition when villagers stay panicked, chunks stay loaded, and golems are killed quickly. Rates vary with kill speed and spawn-platform quality; stacked villages can multiply output.
Does this iron farm work in Minecraft Bedrock Edition?
This design is optimized for Java. Bedrock needs at least 10 villagers, 20 beds, and different village-center rules. See the Java vs Bedrock section for the required changes.
Why do I need a zombie for this iron farm?
On Java, three panicking villagers can summon iron golems. A named zombie in line of sight keeps them panicked without you standing there. Without a scare source the farm is far slower (gossip needs five villagers and is less reliable).
How far should the farm be from my base or other villages?
Keep it at least ~80 blocks from other villages or villager farms so village detection does not merge. The farm chunks must stay loaded (player nearby, spawn chunks, or a chunk loader) to produce AFK iron.
Can I stack multiple iron farms?
Yes. Separate each module vertically (about 20+ blocks) with its own villagers and zombie so spawn volumes do not fight each other. Each working village multiplies your rate.
Did Tiny Takeover or Chaos Cubed break iron farms?
No. Iron golem panic spawning is unchanged through Java 26.2. 26.1 only helps logistics (craftable name tags). Sulfur cubes and sulfur caves from 26.2 do not affect golem farms.
Conclusion
This iron farm design is an excellent addition to any Minecraft 26.2 world. With an output of 330+ iron per hour, you'll never have to mine for iron again. The design is relatively simple to build and doesn't require too many resources, making it accessible even for players in the early to mid-game.
Chaos Cubed didn't change golem farming, so the same panic-villager principles still apply. Keep the zombie named, the chunks loaded, and golems flowing into the kill chamber.
Happy farming, and enjoy your endless supply of iron!